Flutter SDK Integration
Accept payments in your flutter app
Integrate Durianpay Checkout with your android app to start accepting online payments from your customers. Durianpay supports a slew of payment methods such as bank transfers/VA, credit and debit cards, e-wallets (OVO, DANA, LinkAja) and others. Our checkout library provides all the essential features for integrating Durianpay Checkout with the client-side of your application.
Preparation
Create a Durianpay account
If you haven't done it already, click here to sign up. Sign up for Durianpay account here to retrieve API keys for Sandbox environment and to test integrations end-to-end.
Generate API Keys
Retrieve Sandbox API keys that will be used in next section(s) It is okay to have only the
sandboxkey for now. If you havelivekey, you can use it too.Have access to the Durianpay Flutter SDK
dpay_flutterpackage
Steps Overview
- Step1: Setting up Flutter sdk
- Step2: Create an order/token from the server
- Step3: Pass Context, options with orderID and CheckoutListener to Durianpay Checkout
- Step4: Handle callbacks payment success and failures
- Step5: Webhooks / Store fields on your servers (Optional)
- Step6: Verify signature (Optional)
Step 1: Setting up Flutter sdk
In your pubspec.yaml file under the dependencies add the line
dpay_flutter: ^1.4.13Step2: Create an order/token from the server
Use following endpoint to create an order
var options = {
  amount: "20000",
  currency: "IDR",
  order_ref_id: "order2314",              // optional, your order reference
  customer: {
    customer_ref_id: "cust_001",          // optional, your customer reference
    given_name: "Imam Sugiarto",
    email: "imam.sugiarto@koss.info",     // mandatory
    mobile: "08972638003",
    address: {                            // mandatory for BNPL
        receiver_name: "Jude Casper",
        receiver_phone: "8987654321",
        label: "Judes Address",
        address_line_1: "Cambridge layout",
        address_line_2: "Apartment #786",
        city: "Bangalore",
        region: "Jogupalya",
        country: "Indonesia",
        postal_code: "560008",
        landmark: "Kota Jakarta Selatan"
    }
  },
  items: [
    {
        "name": "LED Television",
        "qty": 1,
        "price": "925001.55",
        "logo": "/static/tv_image.jpg"
    }
  ]
};
// Create Orders
dpay.orders.create(options).then(resp => {
    console.log(resp);
    // order_id = resp.order_id;
})
.catch(error => {
    console.log(error.err + ' | ' + JSON.stringify(error.data));
});// Sample response
{
"id": "ord_A31sd3AwAgItmmXdp",
"customer_id": "cus_rX2ABaMbZJ0050",
"amount": "20000",
"currency": "IDR",
"payment_option": "full_payment",
"status": "started",
"order_ref_id": "order2314",
"address_id": 3863,
"created_at": "2021-08-04T06:06:37.849813Z",
"updated_at": "2021-08-04T06:06:37.849813Z",
"metadata": {},
"access_token": "adsyoi12sdASd123ASX@qqsda231",
...
}Read more: Learn more about Orders API.
Step 3: Pass Context, options with orderID and CheckoutListener to Durianpay Checkout
Create a data class DCheckoutOptions with variables as shown in the example below.
    DCheckoutOptions options = new DCheckoutOptions();
    options.locale = "en";
    options.environment = "production";
    options.siteName = "Merchant name";
    options.orderId = "ord_HdmXXXXXXXXX"                    // mandatory
    options.accessToken = "d59XXXXXXXXXXXX"                 // mandatory
    options.currency = "IDR"                                // mandatory
    options.amount = "$AMOUNT"                              // mandatory, amount for each installment or the full payment amount
    options.paymentType = "installment"                     // type of payment
    options.customerId = "cus_Das2XXXXXXXXX";
    options.customerEmail = "mario@supermario.net"
    options.customerGivenName = "John Doe"
    options.customerAddressLine1 = "ramnagar, kayembedu"    // optional
    options.customerCity = "chennai"                        // optional
    options.customerCountry = "india"                       // optional
    options.customerRegion = "asia"                         // optional
    options.customerPostalCode = "523323"                   // optional
    options.receiverName = "dhanraj"                        // optional
    options.receiverPhone = "8999998999"                    // optional
    options.customerMobile = "8939983823"                   // optional
    options.landmark = "avenue east"                        // optional
    options.label = "home"                                  // optional
    options.dark_mode = true                                // optional (Set to true to enable dark mode. In Android, this is available for Android 10 and above only. For Android 9 and below, using this field will not throw errors, but dark mode will not be enabled)
Variable
paymentTypeis optional variable which is necessary only for an installment type of payment. ThepaymentTypecan have the valuesfull_paymentorinstallmentwhich can be passed according to the type of payment. Default value isfull_payment.
Initialize durianpay and pass the event name with their respective handlers as shown below -
 // initialize Durainpay object
 Durianpay durianpay =  Durianpay.getInstance(context);

 // initialize event listeners
 durianpay.on(PAYMENT_SUCCESS, onSuccess);
 durianpay.on(PAYMENT_CLOSE, onClose);
 durianpay.on(PAYMENT_FAIL, onFailed);

 //calling the checkout page with options
 durianpay.checkout(options);

 ...
 // to clear all the listeners
 // durianpay.clear();
Step4: Handle callbacks payment success and failures
The methods onSuccess(), onFailure() and onClose() (or any name provided for the callback functions while registering a listener in the above step) have to be handled as below.
// handlers for the events initialized above
void onSuccess(String response) {
    logger.d("success", response);
    /* Sample response
    {
        "type":"success",
        "response": {
            ...
            "payment_id":"pay_XXXXXXXX",
            "payment_metadata":{},
            "payment_method_used":"none",
            "order_id":"ord_XXXXXXX",
            "amount":"15000.00",
            "currency":"IDR",
            ...
        }
    }*/
}

void onFailed(String response) {
    logger.d("failure", response);
}

void onClose(String response) {
    logger.d("closed", response);
}
Step5: Webhooks / Store fields on your servers (Optional)
Whenever certain transaction actions occur on your Durianpay Checkout integration, we trigger events which your application can listen to. This is where webhooks come in. A webhook is a URL on your server where we send payloads for such events. For example, if you implement webhooks, once a payment is successful, we will immediately notify your server with a payment.completed event. Here is a list of events we can send to your webhook URL.
You can specify your webhook URL on your dashboard (or through your dedicated Customer success manager) where we would send POST requests to whenever an event occurs.
Valid events
payment.completed payment.failed, payment.cancelled, order.created, order.completed
{
  "event": "payment.completed",
  "data":{
    "id": "pay_dAS123ad123Asd",
    "signature": "9e892f199d026d06a56669e658a56f264610431d24e8b4d07f7bd46f6d5062d2",
    "order_id": "ord_XXXXXXXXX",
    "amount": "10000",
    "currency": IDR,
    "paid_at": "2016-09-30T21:10:19.000Z",
    "created_at":"2016-09-30T21:09:56.000Z",
    "metadata": {
      "key": "value"
    },
}
Step6: Verify signature on your server side (Optional)
You will get payment_id through webhook callback (if configured). You should ideally try to validate the payment and store the details in your server/database against the order/transaction accordingly.
First, you need to get verification signature from Durianpay which would have been provided to you in your webhook callback.
{
  "event": "payment.completed",
  "data":{
    "id": "pay_dAS123ad123Asd",
    "signature": "9e892f199d026d06a56669e658a56f264610431d24e8b4d07f7bd46f6d5062d2",    ...
}
If you didn't receive it for any reason, you can call payment status check API from your server/backend which will respond back with signature if status of payment is completed.
"status": "completed",
"is_completed": true,
"signature": "9e892f199d026d06a56669e658a56f264610431d24e8b4d07f7bd46f6d5062d2"
This signature is computed by us using payment_id, amount and your secret key. You need to create the hash on your server/backend where you have all these elements and match with the signature provided by us.
Sample code for signature generation
// Function to generate the signature for verification of payment
//use appropriate key if it is a sandbox order please use dp_test key and if it is a live order then use dp_live key
func GenerateSignature(paymentID string, amount string, accessKey string) (generatedSignature string) {
  //message passed includes payment_id + “|” + amount. Amount is in “15000.00” format
  secretData := paymentID + "|" + amount
  // Create a new HMAC by defining the hash type and the key (as byte array)
  h := hmac.New(sha256.New, []byte(accessKey))
  // Write Data to it
  h.Write([]byte(secretData))
  // Get result and encode as hexadecimal string
  generatedSignature = hex.EncodeToString(h.Sum(nil))
  return
}
Test Integration
Test payments
You can use following test payment credentials to test payments.
Verify Payment status
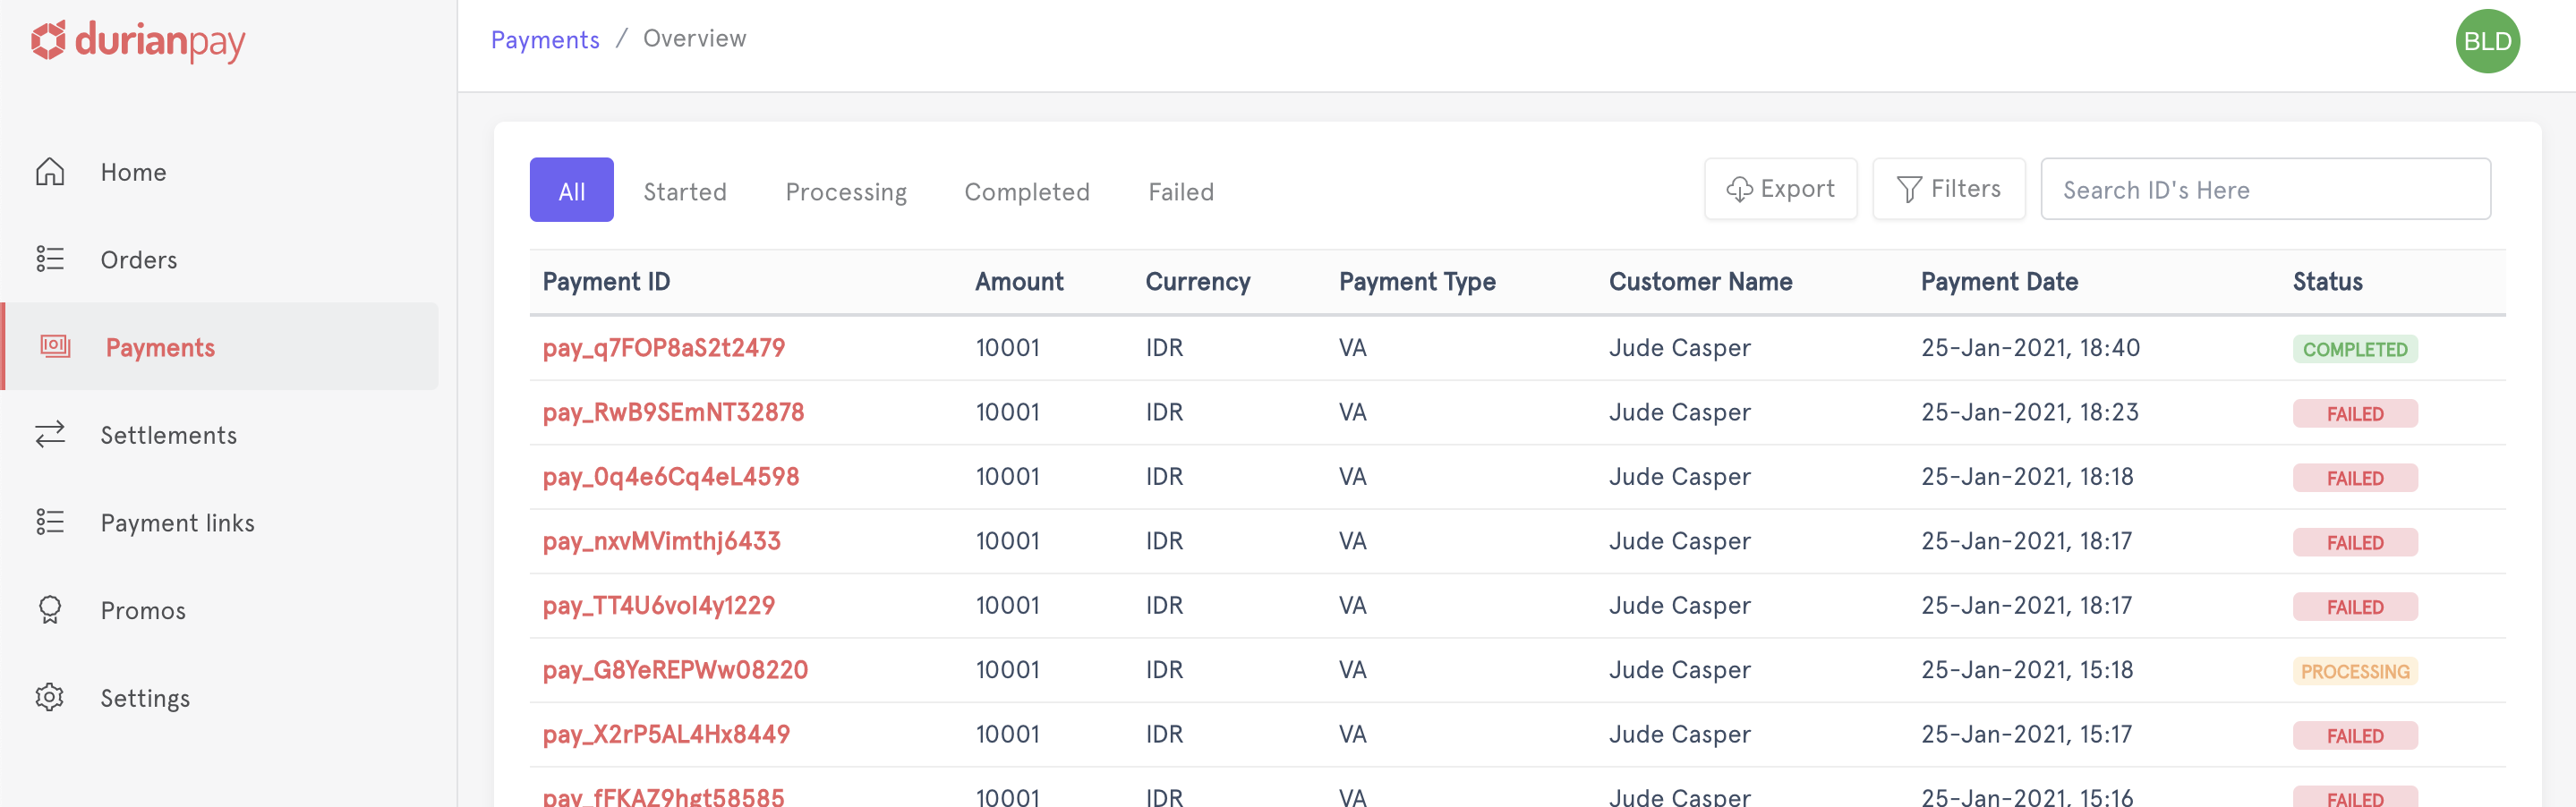
Through Dashboard
- Log into the Dashboard and navigate to Payments in sidebar.
- Check if a
payment_idhas been generated. If nopayment_idhas been generated, it means that the transaction has failed (and didn't even initiate from user's end)
Through APIs
Use following endpoint to do status check on a payment (Read more about Payment Status Check API)
curl -u <YOUR_SECRET_KEY> \
-X GET https://api.durianpay.id/v1/payments/pay_B14sdfwAdmmSDF24a/status \
-H "content-type: application/json"'{
"data": {
"status": "completed",
"is_completed": true,
"signature": "9e892f199d026d06a56669e658a56f264610431d24e8b4d07f7bd46f6d5062d2"
}
}Accept LIVE payments
After testing the flow of funds end-to-end in sandbox mode, you can switch to the live mode and start accepting payments from your customers. However, make sure that you swap the test API keys with the live keys.
- Log into Dashboard and switch to
Livemode on the sidebar menu. - Navigate to Settings → API Keys to access your API key for live mode.
- Replace the
sandboxAPI key with theLiveKey in the Checkout code and start accepting real-time payments.